bathroom renos in progress

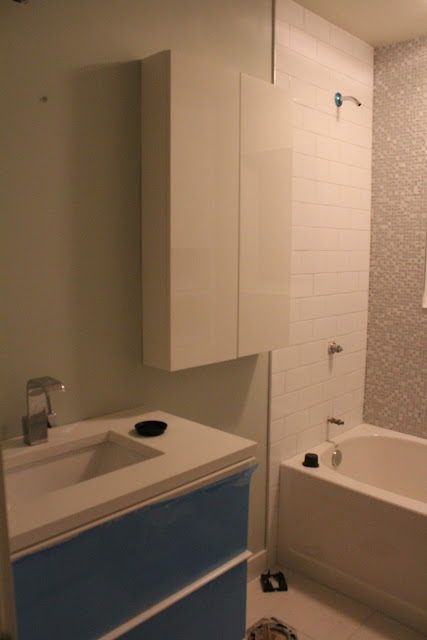
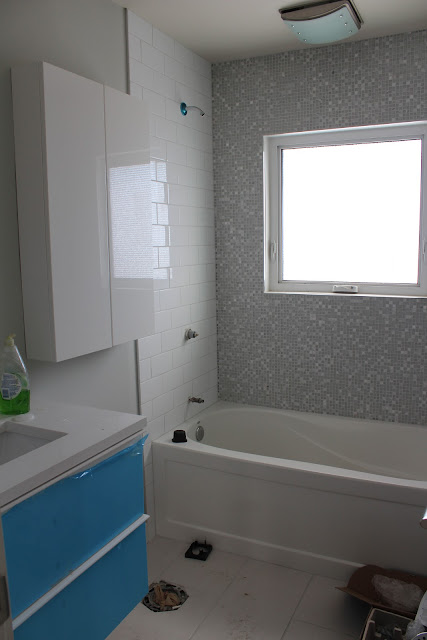
Here's a few photos of our bathroom renovations in progress.  Both bathrooms are in the same house but in two different suites.  These pictures aren't great especially since the bathroom lights are not yet installed and there are only light bulbs hanging.  The first two pictures are from the upstairs bathroom, which is quite small.  The homeowner loves white in bathrooms so we used a lot of white including Ikea's godmorgan white high gloss vanity and wall cabinet.  The back wall of the bathtub area is a small square mosaic tile with both marble and glass tiles.  The tile looked very white when we bought it but the glass tile turned out to look blue-ish on the walls, which influenced the wall colour, which is Benjamin Moore's Grey Owl. 

ikea godmorgon gray owl grey bathroom
Bathroom - reno in progress
One thing I learned about Ikea wall mount vanities is that it's easiest to use their sink tops.  The depth of their vanities is shallower than most so a sink top from elsewhere probably won't work (trust me I tried).  Then we found out that we could get our sink counter included with our quartz being installed in the kitchen so we decided to go with that along with an undermount sink.  However, because of the smaller size of the vanity I had to choose the smallest undermount sink I could find in order to have enough room for the faucet.  Then when we installed the drawers for the vanity we had problems pulling out the top drawer because of the undermount sink.  Our contractor made some changes to the inside of the drawer that made it work but it did reduce the drawer space a small amount in the middle.  So I took a look again at the Ikea sink tops after my experience and realized that their sink tops are a lot thicker so the top part of the undermount sink starts up higher and the bowl is shallower than average, which is how their undermount sinks work.  Lesson learned!


ikea godmorgan gray owl grey
bathroom - reno in progress
Here's the basement bathroom.  We are using honed calacatta marble on the floors that I found on Kijiji.  The seller had purchased too much and could not return it so I ended up getting it for less than $5 per square foot (yippee!).  Trust me I would have used this in the main bathroom but didn't find it until after it was almost complete. I think it looks beautiful especially since this bathroom is larger and showcases the veining better because of the size of the floor.  The wall colour here is the same as upstairs, Benjamin Moore Grey Owl. 

grey owl gray marble tile
Basement bathroom - reno in progress
I used the same tile for the accent tile as we did in the upstairs bathroom.  I originally wanted a pattern with 3 rows of subway tile and a few rows of accent tile, repeated every 3 rows of subway tile.  However when the tile installer saw it he just started laughing loudly as though he needed to wake me up from my dream.  Maybe in a million dollar house, he said.  Needless to say my pattern didn't happen and I had to beg and plead just to get two rows of accent tile.  I have to say that I think it was worth the begging since the two rows are so much nicer looking than the one row that you often see. This wall tile was just installed and not grouted yet so it will look better once it's done and I'll be sure to post pics once it's completed. 

Basement bathroom - reno in progress
Hope you enjoy the rest of the weekend and check back for updates over the next couple weeks as we continue our renovation and (hopefully) finish up!  I will also list all the resources once I have a minute to breathe at the end. 

No comments:

Post a Comment